20150626更新基于 linux kernel 4.0.6 的步骤,建议先看最后更新的部分
20151205更新,发现在8月13日时,来自4.2的mt7601u驱动被移植到了4.1.5,所以,升级内核到4.1.5或以上,只需要下载 mt7601u.bin 放到 /lib/firmware/ 下就可以了,就是执行下面这条命令。具体来源见 https://github.com/raspberrypi/linux/issues/1090
sudo wget https://github.com/porjo/mt7601/raw/master/src/mcu/bin/MT7601.bin -O /lib/firmware/mt7601u.bin
如果内核是4.1.5以上,下文都不需要看了,驱动已经自带,不需要自己编译,只需要补上 /lib/firmware/mt7601u.bin 就可以了。
否则,看下面的几行来更新系统,再补上 mt7601u.bin ,也就ok了。
20170107更新,最近把卡格了重新装raspbian系统,是2016-11-25的版本,内核是4.4,发现mt7601u.bin也已经自带,直接插上就用,不需要折腾。这个版本的蛋疼之处在于SSH默认关闭,需要在启动分区加上一个名为ssh的文件,才可以开启SSH。
首先,更新你的树莓派(避免编译出来版本不对导致不能insert):
sudo apt-get update
sudo apt-get upgrade
sudo apt-get dist-upgrade
sudo rpi-update
更新gcc和g++:
#可能有点问题,先不要更新  20150506
#sudo apt-get install gcc-4.8 g++-4.8

#sudo update-alternatives --install /usr/bin/gcc gcc /usr/bin/gcc-4.6 20
#sudo update-alternatives --install /usr/bin/gcc gcc /usr/bin/gcc-4.8 50
#sudo update-alternatives --install /usr/bin/g++ g++ /usr/bin/g++-4.6 20
#sudo update-alternatives --install /usr/bin/g++ g++ /usr/bin/g++-4.8 50
到MTK的官网下载驱动并传到树莓派上:http://www.mediatek.com/zh-CN/downloads/mt7601u-usb/
解压:
tar xjvf DPO_MT7601U_LinuxSTA_3.0.0.4_20130913.tar.bz2
cd DPO_MT7601U_LinuxSTA_3.0.0.4_20130913/
打开 common/rtusb_dev_id.c,在 {USB_DEVICE(0x148f,0×7601)}, /* MT 6370 */ 下面加入以下内容:
{USB_DEVICE(0x148f,0x760b)}, /* 360 Wifi */
{USB_DEVICE(0x2955,0x1001)}, /* baidu Wifi */
{USB_DEVICE(0x2a5f,0x1000)}, /* Tencent WiFi */
{USB_DEVICE(0x2955,0x0001)}, /* XiaoDu Wifi */
{USB_DEVICE(0x2717,0x4106)}, /* Xiaomi Wifi */
打开 include/os/rt_linux.h,找到
int fsuid;
int fsgid;
并把它改为
kuid_t fsuid;
kgid_t fsgid;
查看当前内核的版本:
uname -r
显示我的版本是3.18.8+ ,所以下载对应的3.18的linux源码,然后解压:
wget https://github.com/raspberrypi/linux/archive/rpi-3.18.y.tar.gz
tar xvfz rpi-3.18.y.tar.gz
取得root权限,将源码移至/usr/src目录:
sudo su
mv linux-rpi-3.18.y /usr/src
建立内核模块库目录的链接:
ln -s /usr/src/linux-rpi-3.18.y /lib/modules/3.18.8+/build
cd /lib/modules/3.18.8+/build
make mrproper 可以看作更加强劲的 make clean 命令,用来清除环境变量,即清除配置文件,一般编译内核前都要运行:
make mrproper
将当前正在使用的系统的内核配置生成内核配置信息:
gzip -dc /proc/config.gz > .config
生成编译内核所需要的东西:
make modules_prepare
获取内核编译时生成的内核模块导出符号文件。因为不是从头编译内核,所以没有,但是编译内核模块需要这个:
wget https://github.com/raspberrypi/firmware/raw/master/extra/Module.symvers
再到网卡驱动目录中编译驱动(进入到DPO_MT7601U_LinuxSTA_3.0.0.4_20130913):
make
make install
modprobe mt7601Usta
如无报错,驱动就安装完成了。
之后是修改/etc/network/interfaces文件,我改成这样:
auto lo

iface lo inet loopback
iface eth0 inet dhcp

allow-hotplug wlan0
iface wlan0 inet manual
wpa-roam /etc/wpa_supplicant/wpa_supplicant.conf
iface default inet dhcp

allow-hotplug ra0
iface ra0 inet manual
wpa-roam /etc/wpa_supplicant/wpa_supplicant.conf
其中添加的ra0是对应MT7601的,wlan0没有改,插其他无线网卡应该也能正常用。
然后修改/etc/wpa_supplicant/wpa_supplicant.conf,填入要连接的无线网络的配置。
ctrl_interface=DIR=/var/run/wpa_supplicant GROUP=netdev
update_config=1

network={
        ssid="yourssid"
        psk="yourpassword"
        proto=RSN
        key_mgmt=WPA-PSK
        pairwise=CCMP TKIP
        group=CCMP TKIP
        auth_alg=OPEN
        priority=3
}
最后的priority是该配置的优先级,数字越大越先连接。添加几个就能在不同的地方自动连接了。
重启机器,用ifconfig、iwconfig等测试无线网卡能否正常工作。
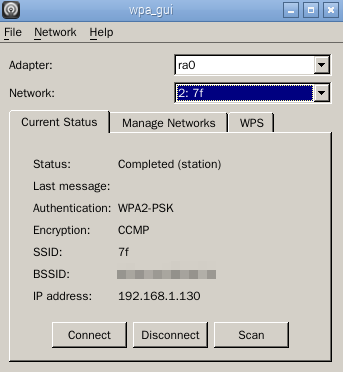
rdp远程登录进去,打开Wifi设置后的截图
=========================
20150306更新:在内核更新到3.18后,驱动需要重新编译,出现了种种问题,在参考了[2]和[3]后,升级了gcc版本和修改了rt_linux.h。
20150306于RaspberryPi Model B+测试成功,内核为3.18.8。
20150506更新:在升级gcc后,似乎在make modules_prepare时会遇到compiler too buggy的问题。我又找了一下,还是在树莓派的官方论坛,https://www.raspberrypi.org/forums/viewtopic.php?f=28&t=49864&start=179这里:
On the first time running rpi-source, you have to have the default gcc 4.6.3. You have to also specify –skip-gcc so that rpi-source doesn’t care about the different gcc in use and what’s been used to build the default kernel. If you run rpi-source with 4.8.2 as the default gcc, you’ll end up getting message like this during the kernel preparation (make prepare?) phase:
…error Your compiler is too buggy; it is known to miscompile kernels…
That’s why you have to first run rpi-source with the default gcc 4.6.3 with –skip-gcc parameter. After rpi-source gets all done, you have to change to gcc 4.8.2. The kernel doesn’t let you compile the kernel itself, but you can compile compatible modules for it. It’s bit tricky . It would be great if the default Raspbian gcc would compile compatible modules. Maybe gcc 4.8.3 would not complain about the kernel miscompile problem?
似乎是先用自带的4.6.3 prepare好了之后,再换用4.8的意思,各位研究一下吧。
20150623更新:在https://www.raspberrypi.org/forums/viewtopic.php?f=28&t=49864&start=353找到了一个适用于3.18.11+ #776的驱动,传到了百度盘,使用方法:
tar xzf mt7601-3.18.11-776.tar.gz
/install.sh
另外,在github上有了第三方的驱动,适用于kernel 3.19以上的版本,并且被合并到kernel 4.2,所以未来升级到4.2的时候就再也不用烦恼了。如果要自己编译,就到上面的github链接看看吧。
20150626更新
今天把我的RPi B+更新到了4.0.6内核,(Linux raspberrypi 4.0.6+ #798 PREEMPT Tue Jun 23 17:48:03 BST 2015 armv6l),然后成功使用了上文提到的github的新驱动。
步骤与之前的基本相同。以下步骤未详细说明的都在本文中有提及。
- 更新树莓派
- 确保使用的是gcc 4.6
- 查看当前内核的版本,下载对应的源码,解压,移到/usr/src
- 建立内核模块库目录的链接,并切换目录到/lib/modules/`uname -r`/build
- make mrproper
- sudo modprobe configs #这会生成 /proc/config.gz
- gzip –dc /proc/config.gz > .config
- make modules_prepare
- 下载Module.symvers
- 切换到gcc 4.8,(就是前文update-alternatives的那几行)不然编译出来会kernel oops,我试过了,20150506的更新也有提到这一点
- 把https://github.com/porjo/mt7601或官方驱动中的src/mcu/bin/MT7601.bin复制到/lib/firmware/下,命名为mt7601u.bin
- 下载驱动源码 https://github.com/kuba-moo/mt7601u/archive/master.zip 并解压到你喜欢的目录,在usb.c里自带了很多USB DEV ID,包括360腾讯小米等,应该不用自己添加了
- make && sudo make install && sudo depmod
- sudo modprobe mt7601u(make install 之后mt7601u.ko会放到/lib/modules/4.0.6中,如果有问题就放到/lib/modules/4.0.6+/kernel/drivers/net/wireless/下吧)
- 插上你的MT7601,ifconfig看一下有没有wlan0吧
- /etc/network/interfaces文件中没有ra0部分,只用wlan0
相关参考:
1.在树莓派上使用360WIFI(也适用于小米、百度、腾讯WIFI):http://shumeipai.nxez.com/2014/12/07/raspberry-pi-use-360wifi.html
2.http://www.raspberrypi.org/forums/viewtopic.php?f=28&t=98913
3.http://www.raspberrypi.org/forums/viewtopic.php?f=28&t=49864&p=690479